DIY Mother's Day Brunch Board

Pssst, hey papas and kiddos, this post is for you! It’s very likely that many of us are going to be home for Mother’s Day brunch this year due to quarantine, which is usually my top choice anyway (being home, not quarantine, just to be clear.) However, I know that is not the case for everyone, as Mother’s Day brunch is the biggest restaurant day of the year - it trumps Valentine’s even. Therefore, we are offering up a little DIY Brunch Board that will make the mamas in your life feel extra swanky. Though the presentation looks amazing, it comes together so EASILY. Plus, it’s the perfect ”let the kids” activity! Win and win.
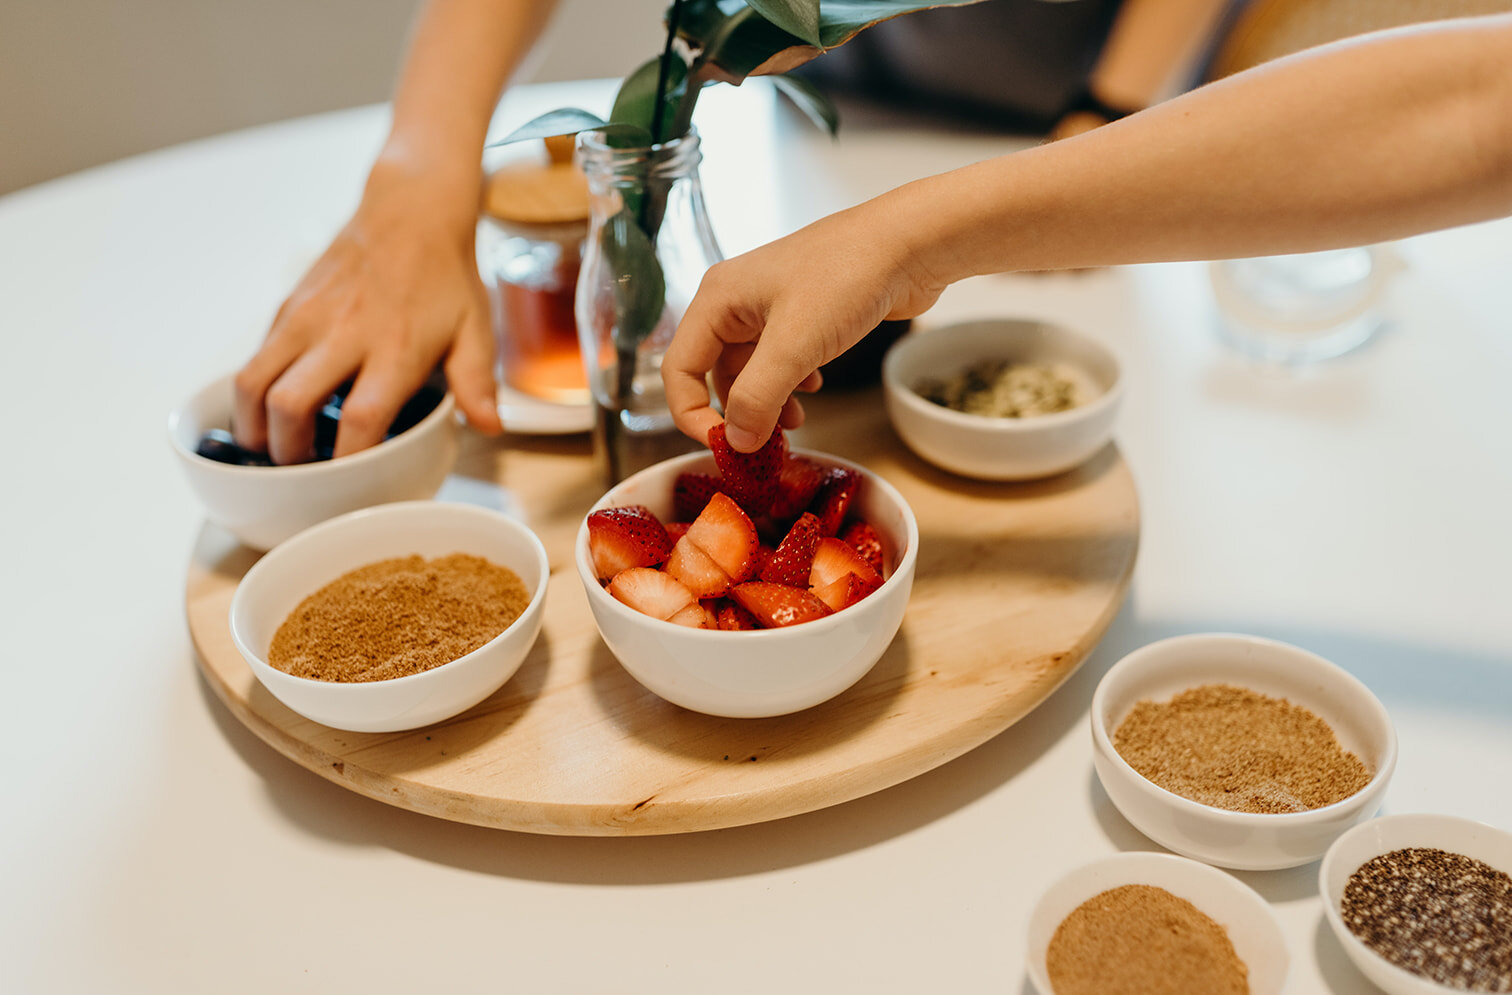
Lunch, dinner, and appetizer boards have been a staple over here. My kids don’t blink when I say make a board lunch, so when I asked them to help me make a breakfast one they knew exactly what to do - with a little of this, and a little of that, a little salty, and a little sweet - voila. We had the best time, and as you can see from the video below, it was a big hit.

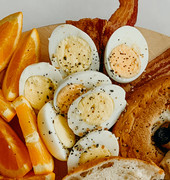
The key to truly making this easy is using what you have. Here’s what we had in our fridge and pantry to utilize the other day: eggs, fruit (berries + citrus), bacon, deli ham, leftover sweet-potato fries, Trader Joe’s gluten free everything bagels, and our super easy paleo waffle recipe ingredients. (Not pictured, because I forgot.) We also had: maple syrup, cream cheese, organic fruit jam, and chocolate date sauce - so good! If you desire, add cheese, veggies, spreads, olives, etc. I chose to keep it simple + sweet and didn’t want to veer from the brunch vibe.
Items you can make ahead:
I do recommend making some items ahead if you are wanting to present this to mom in bed. But brunch has some flexibility on time, so to each their own. What can you make ahead? The answer: everything! Waffles (fresh or frozen), potatoes (fries, hash, cubed, baked, you name it,) pre-cut citrus, fruit, bacon, and boiled eggs can ALL be made ahead!

Ways to make it even easier:
Use pre-made: You know we like HIVEhomemade over here, but we also know what it’s like to simply need to get.it.done. Bacon is… well… the best, but you don’t have to make it. There are some pre-made options now and pre-sliced deli ham. (Applegate uncured smoked honey ham is my fave!) Also, if you don’t have time to make waffles and fries use frozen options, and don’t forget bread, croissants, bagels, pastries, or donuts from down the street work too!
Don’t cut things: Leave things whole. I will say, cutting items such as donuts, waffles, bagels, and veggies into smaller portions does add to the aesthetics and makes for easier consumption. ;) But who needs to cut fruit when you have berries or grapes. Also frozen fruit is a fun option (especially for an outdoor picnic), or dried or freeze dried. (I’m looking at you, dad who over apocalypse-prepped with the 20lb bag of freeze dried bananas in your closet.)


Let the kids help:
This is seriously such a kid-friendly activity, and it won’t slow you down, especially with a little prep in place. Their random placement and creativity, can truly make an amazing board for the eyes and appetite, and even if letting the kids in slows things down a bit - brunch is all about flexibility. But to streamline the process, I recommend doing the hard things before the kids start helping. If you are making bacon, slicing home-fries, etc., make these items before the kids are invited to destroy, I mean… help in the kitchen. I recommend, having their items set out in their own space with age appropriate tasks. Little ones can cut up items like bananas, breads, and soft things with butter knives, bigs can help with the waffle iron or real knife situations, assuming they already have a little experience.

Lastly, use our *perfect boiled egg recipe:
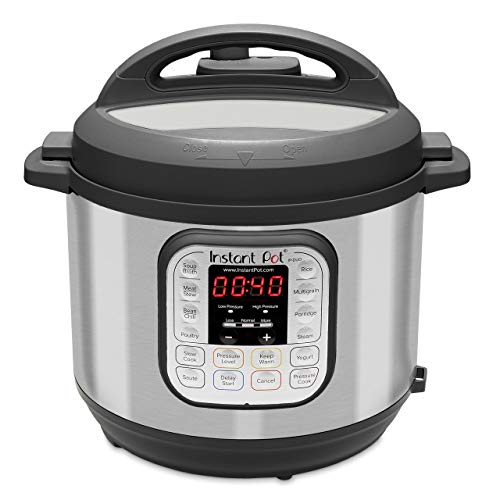
I love my Instant Pot, but after making boiled eggs and realizing that I never have to chip away at an egg shell that refuses to separate from a boiled egg white again, I knew this was a relationship to hold onto. Instant Pot boiled eggs are the easiest and best boiled eggs. There is no other way to do it. Trust me. Buy an Instant Pot. Now. In fact, buy it for your mama, if she doesn’t have one. She will thank me. As a minimalist in training, I have 3 + travel with an Instant Pot buddy on road-trips. They are that useful and easy. (*Instant pot is required for our “perfect” suggestion, but we have included a stove top version that works allllmost as beautifully.)

Perfect Instant Pot Boiled Egg
Stove Top Version Included Below*
===========
HIVEhomemade | 5/1/2020
Yield: 6-12 eggs
Ingredients:
- 1 cup water
- 6-12 eggs
Instructions:
- Pour 1 cup of water into the bottom of your Instant Pot, and place the metal trivet inside. You don't want the eggs to sit directly in the bottom of the pot.
- Gently set the desired amount of eggs onto the trivet.
- Using the manual setting + high pressure, set the cook-time for 4-7 minutes, depending on how you prefer your eggs. (4 minutes for a more soft boiled egg up to 7 minutes for a hard boiled egg.)
- When the cook time is complete, quick release the pressure and immediately transfer the eggs into an ice bath to stop the cooking process.
- Allow the eggs to cool for 5 minutes before draining.
- Peel and enjoy!
*To make on the stove top: Place eggs in a large saucepan. Cover them with cool water by 1 inch. Cover the pan with a lid and bring water to a rolling boil over high heat; when the water has reached a boil, set the timer for the desired time.
How long to boil:
- For soft-boiled eggs: 4 minutes
- For slightly soft-boiled eggs: 5 minutes
- For custardy yet firm soft-boiled eggs: 6 minutes
- For creamy hard-boiled eggs: 7 minutes
- For firm yet still creamy hard-boiled eggs: 8 minutes
- For very firm hard boiled eggs: 9 minutes
Alright friends, you’ve got this! Make mama proud, let her sleep in, and show her the best Mama’s Day Brunch Board your pantry has to offer. And in this current pandemic world we live in, bonus points if you bust out a mimosa or latte to make her day extra bright. Love to all, and enjoy! Let us know how it goes!

Andea Beims
CREDITS:
Photos by HIVEhome team-member, Jessica Collins of Jessica Collins Photography.
Editing, Layout + Publishing by HIVEhome team-member, Andrea Haney
Author + Recipe, Andea Beims


